This one includes:
5/8 X 1 5/8 solid pine moulding
3/4" square dowel
Miter box/saw
Brad nails
Hammer
Wood glue
Clamps
Sandpaper
Wood filler/putty knife
Matte white Rustoleum spray paint
1/4" 24 gauge hardware cloth
Gold Rustoleum spray paint
Staple gun/staples
3/4" S hooks
First thing I did was measure the size of the space I wanted to hang this in. Then I cut the dowels to size to create a rectangular frame for the moulding to attach to. I sanded the edges a bit and used a small brad nail and wood glue to secure them together. Attaching the pine moulding to this frame leaves space between the moulding and the wall so you can hang your jewels more easily, and also gives you a place to attach the hardware cloth so the frame can sit flush to the wall, as you can see in the photos below.
Once the dowel frame was built, I cut 45 degree angles on the corners of the pine moulding, making sure the outside edges were the same as the length of the rectangular frame I just built. Remember, measure twice, cut once! Lightly sand the edges after cutting.
Then I put wood glue on the dowel frame and bottom side of the moulding pieces and used clamps to secure them together. Make sure the corners of the moulding don't have any space between them. Leave at least 24 hours for the glue to dry completely before removing the clamps. After removing the clamps, I put small brad nails into the moulding and through the square dowel for extra strength. I only put them in the corners, because each one you do will need to be filled and sanded before you can paint the frame.
The next step is to fill and sand the entire frame. Take the wood filler and fill in any of the nail holes you created. I also had minor spaces where the 45 degree angles came together on one side, so I filled it in with wood filler so it wouldn't be noticeable when painted. After the wood filler has dried, sand the entire frame thoroughly, and wipe it off with a moist towel to get it ready for painting.
Paint the frame using the matte white spray paint. I did 2 heavy coats that seemed to cover it well. Don't forget to sand lightly in between.
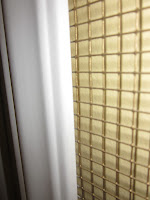
Once the frame is complete it's time for the hardware cloth. It comes in a silver color, but I wanted mine to be gold, so I cut the hardware cloth to size, and then spray painted it thoroughly on both sides.
After it is dry, use a staple gun to attach it to the back side of the moulding. Voila!
I then realized that I hadn't figured out how I was going to secure it to the wall. Oops! I ended up using the extra pieces of dowel I had from making the frame. I attached them securely to the wall using wood screws. Then I attached the frame to the dowels on the wall from above and below using the same wood screws. As you can see from this photo, I should have pre drilled the holes to avoid the cracking of the wood. This isn't the prettiest solution, but I never see it because the height of the frame is about a foot taller than I am!
The last piece to this puzzle are the S hooks that the jewels will hang on. They also came in silver so I spray painted them gold. I found that doing multiple light coats worked better for these.
The best part of this whole process is decorating the frame with your jewels! It really turns into a piece of art.
Enjoy!


